Jun 22, 2020

Tie Clip Money Clip Bender Instructions

I'm always looking for easier ways to make things. This new tool is a Tie Clip Bender, but can also be used to form Money Clips.
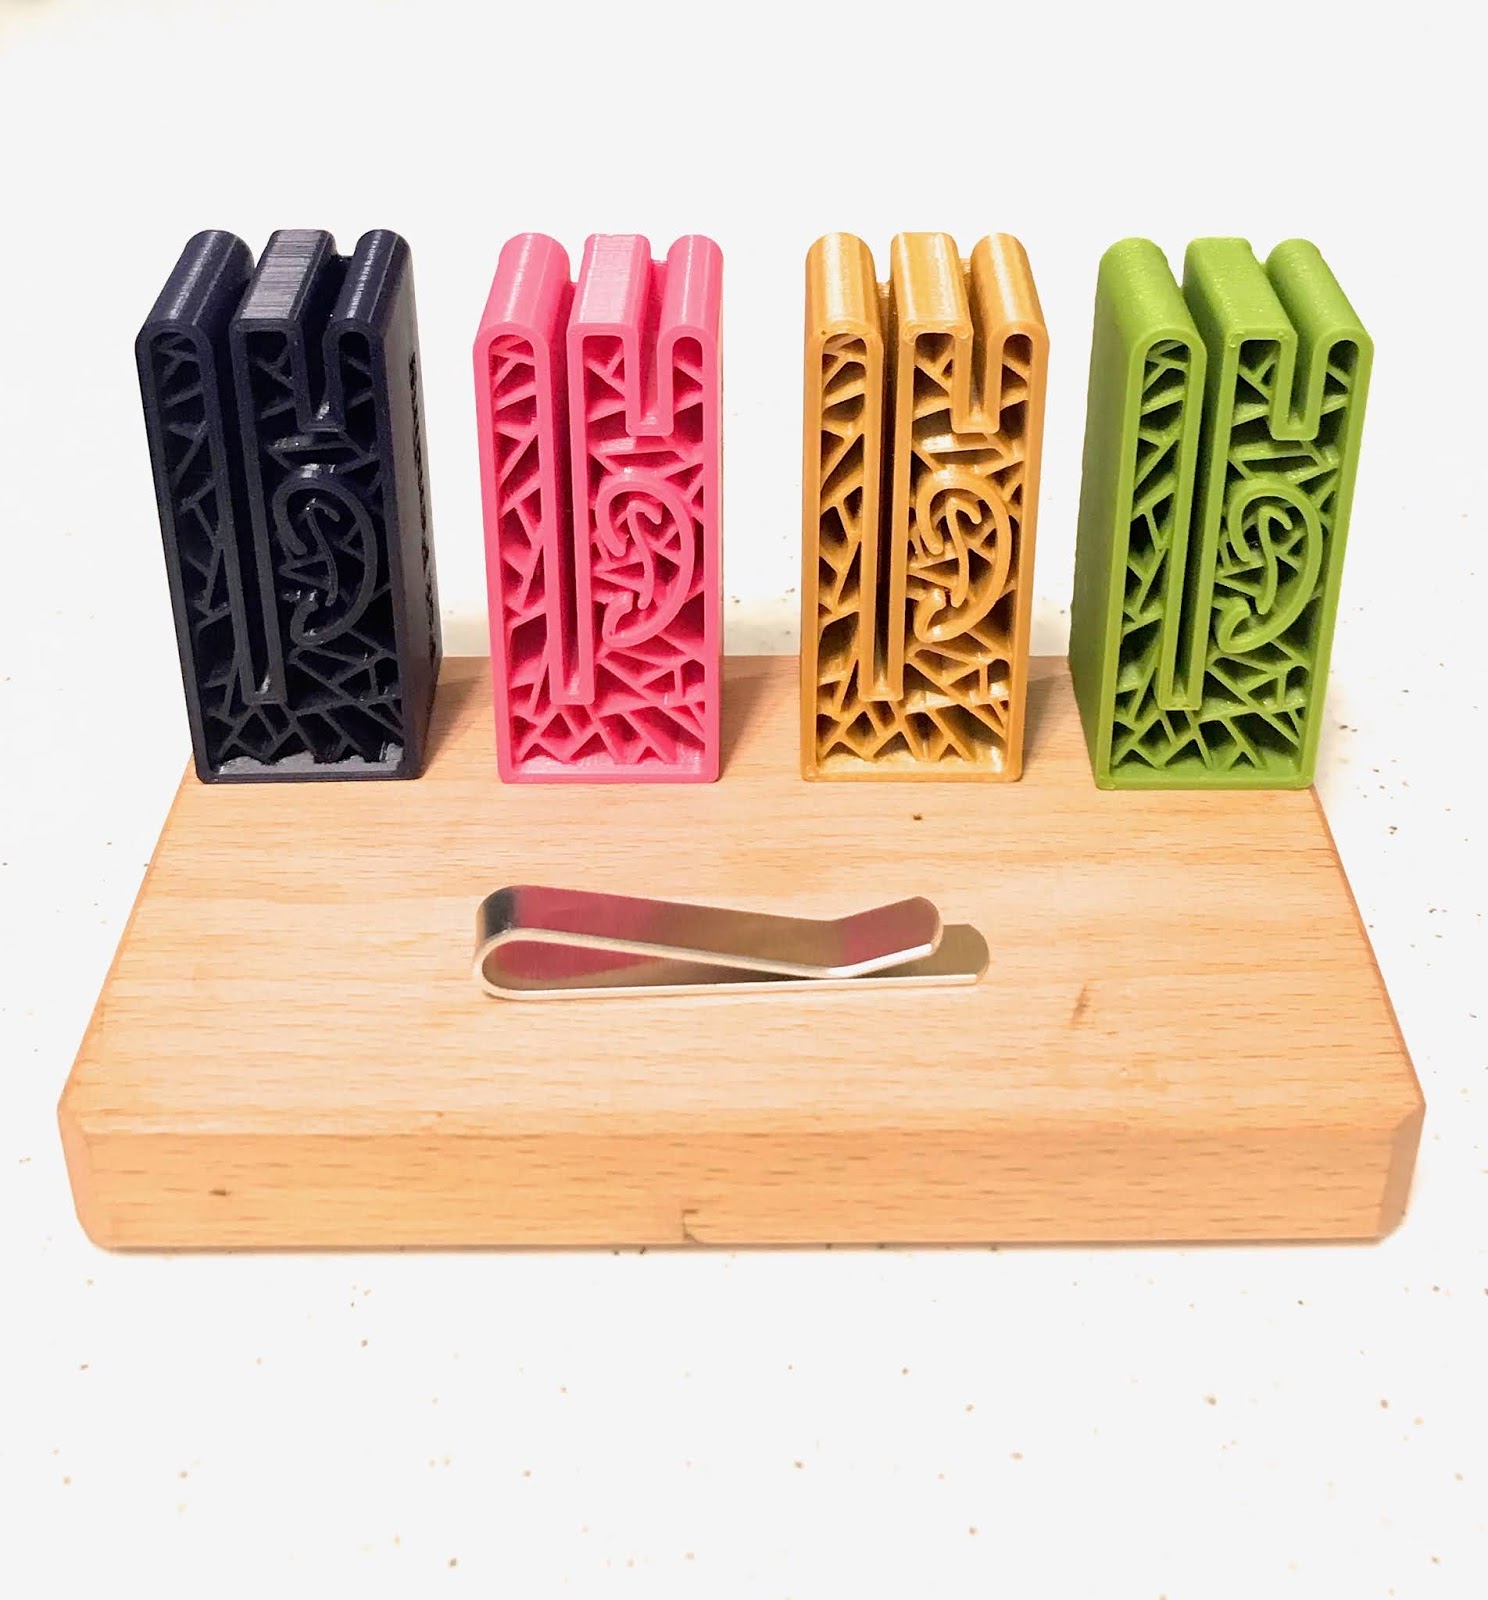
There are similar tools, but this tool has an open channel and will allow multiple widths of blanks to be formed into a Tie Clip. Check out this video on how to use our bender. * Patent Pending.

You can find this tool in our ETSY Shop Gottagettadeal: https://www.etsy.com/listing/814351444/tie-clip-or-money-clip-bender

Enjoy creating!
Lizz
Ear in the Envelope Inc / Gottagettadeal on ETSY

Feb 24, 2017

Torch Time with Lizz Barnes: Learn to Soften Metal

This is a great video teaching you how to soften metal with a butane torch!

Watch and learn! :D


Visit our ETSY shop for Supplies
at www.etsy.com/shop/gottagettadeal

Enjoy creating!
Lizz 

Apr 20, 2016

Numberall and Stainless Steel Metal Stamping Blanks at Gottagettadeal on ETSY

A couple of years ago I found a cool tool on Ebay called a Numberall.  
It's a tool used to stamp metal tags, and tools for industrial shops.


I was looking for a tool that I could use for metal stamping.  
My goal was to find something that was faster, easier on your body
 (no hammering), and cleaner stamping than handstamping.


Well, this turned out to be the perfect tool.  
It doesn't work well on Aluminum 
because it leave little marks on soft metal.  
But it is perfect for stainless, brass, copper and sterling.

I was lucky, I found a used Numberall on Ebay for $225.  
There are new Numerall's available.  
If you stamp constantly, this may be worth the cost of a new tool.

The Numerall that I have has 27 spaces, 
so I have to plan on exactly how long my phrase will be. 


I've also added marker lines on the exact spot 
of the stamping area, so I can line up the stamping blank.  

'

I use masking tape to hold the blank in place while stamping the letters.


There is a wheel with letters and a red knob.  Turn the red knob to find the letter you need.


Press the handle down and the tool will lower and stamp the letter you chose.  
As you release the lever, the plate will move one letter space.  
This tool reminds me of the older twist label makers.


Here's an example of a stamped stainless steel cuff blank.


To bend the cuff use a bracelet bender to get the curve.  Because the cuff is so stiff, you'll have to hold your thumb firmly at the base of the cuff as you are curving the piece around the tool.


You'll notice that the ends flair a bit.  


At this point use the bracelet making pliers to curve the ends.  
I use the smallest barrel.


Final Cuff

You can get the supplies for this project at at our ETSY shop 

Surgical Steel Cuffs

Bracelet Bender

Bracelet Pier

Enjoy creating!

Lizz Barnes


in the warehouse district of Peoria, IL
820 SW Adams Street, Peoria, IL 61602
820adams@gmail.com


Metal Stamping Blanks and Metal Stamping Tools


Aug 28, 2015

Safety Equipment and Metal Stamping Jewelry


 Safety Equipment and Metal Stamping Jewelry, what? why?

Passions, like metal stamping, may ebb and flow, 
but your body will be with you for your entire journey in this life.  
Taking care of it has to be a PRIORITY!

Here's a list of some helpful tips

1 - Safety Glasses - Always protect your eyes.  Jewelry making is close detail work, wearing a shatterproof pair of magnifying glasses is a simple and safe addition.

2 - Work Gloves - A thin pair of grippy gloves will save your hands.

3 - Ear Protection - You may not have thought of this one.  But constant hammering will eventually harm your hearing.  Protect it!

4 - Dust Mask - If you sand, it is best to sand under a trickle of running water.  But.... if you can't, you will want to protect your lungs from floating metal dust.

5 - Rubber Block - Many people don't realize that a RUBBER block under your METAL block deadens the sound of hammering, and relieves the stress on your joints when you hammer.  Be good to yourself add a Rubber Block to your metal stamping routine.

6 - Lighter Hammers or Brass Hammers - Constant hammering will eventually take a toll on your wrist, elbow and shoulder.  An 8 oz hammer has plenty of force for stamping.  Bigger is not better in this situation.
Brass hammers are softer metal than steel and will reduce the stress on your body.  Brass hammers will also reduce the stress on your stamps.

Remember, you've only got one body.  So take care of it!

Happy Stamping!
Lizz Barnes
Ear in the Envelope Inc


Mar 30, 2015

Jan 8, 2015

Rolling Mill Texture Embossing Plate

Ear in the Envelope Inc now carries a variety of Rolling Mill Texture Embossing Plates.

You can find these Rolling Mill Texture Embossing Plates in our Etsy shop at: 


A Rolling Mill is a GREAT jewelry making tool.

A Rolling Mill combined with a Rolling Mill plate can create amazing texture patterns in your metal jewelry.

A Rolling Mill is a heavy manual machine with two hardened steel rollers, a tension adjustment and a crank that moves the metal and a texture plate through the rollers.  The pressure created by the rolling motion presses the design from the Rolling mill plate into the metal.  Adjusting to a tighter tension will create a deeper impression.

Durston is my favorite brand of Rolling Mill.  Their quality is amazing and they accept the thicker Rolling Mill Texture Embossing Plates.

Here’s a link to the Rolling Mill we use at Ear in the  Envelope Inc:


Rolling Mill Texture Embossing Plates - are placed on a piece of dead soft metal and rolled through the rolling mill which creates a beautiful impressions in the metal.

Until now there were a limited number of designs available.  I don’t know about you, but I need variety.


HERE's a Video on How to Line Up Your Blanks on the Celtic Rolling Mill Plate


So we took on the challenge of creating a good variety of Rolling Mill plates for our customers.  A group of fantastic artists have been working to create some amazing designs.  We will also accept custom requests for rolling mill texture embossing plates.

These plates measure 3” x 6” with a thickness of just about 1/16” (actual .053”).

***WARNING - Our Rolling Mill plates will NOT work on the Eurotool Rolling Mill.  The rollers will not extend far enough to for the thickness of our stainless plates.  

I recommend using a Durston Rolling Mill.  Make sure that your rolling mill can accept a width of 3”.

Our current list of designs are:
- Puzzle
- Wavey Leaves
- Van Gogh Swirls

*****PLEASE let us know what designs you would like?

Enjoy creating,
Liz :-)


Ear in the Envelope Inc.


Follow our Blog for Updates on New Techniques and Tools


***************************************

These are a few of the most helpful links on my blog:


**WHAT SUPPLIES DO I NEED TO GET STARTED METAL STAMPING

INSTRUCTIONS FOR METAL STAMPING

HOW TO SIZE A CUFF

RING SIZING INFORMATION

**Video: HOW TO USE A WRAP 'N TAP (Ring Bending Tool)

**Video: HOW TO USE A BRACELET BENDER

TWO SIDE METAL STAMPING

HOW TO CREATE CONTRAST IN YOUR ALUMINUM STAMPED PROJECTS

**Video: HOW TO ATTACH RIVETS AND EYELETS

HOW TO MAKE A WRAP RING

HOW TO BEND A TIE BAR OR MONEY CLIP

MONEY CLIP DETAILS - CREATING THE SNAP

HOW TO CREATE TEXTURE WITH A ROLLING MILL

TUMBLING YOUR OWN ALUMINUM BLANKS

HOW TO PUNCH HOLES IN YOUR HEART CHARMS VIDEO


Sep 12, 2014

Setting Rapid Rivets in Leather Cuffs

Setting Rivets in Leather can be a challenge.  
But with a few tips you can succeed!


You'll need a Leather Cuff and an ID Tag with 2 holes.
The leather cuff I am using is 1/8" thick and the ID Tag is .063" thick.


Step One:  Flip the cuff over so you can make marks on the back.
Find the center of the leather cuff.


Step 2:  Center the Blank on the back of the leather cuff.


Step 3: Use a pen to mark the location of the holes.


Step 4: Use the smallest hole on a leather punch.  
Punch holes in the marked locations.


Step 5: Flip the cuff over to the front.  
Place the blank in the correct position making sure to line up the holes.
Place the post half of the Rapid Rivets through the hole.


***I use Mini Rapid Rivets for this project because the holes 
on the oval tag are about 1.5mm.  Because this is just barely long enough 
for the thickness of the metal, you will not be able to use a setter 
or the regular recommended process.


Step 6: Flip the cuff over and attache the rivet caps.  
Hammer the cap until you are sure that the two pieces are attached.
Make sure to use a hard steel hammer.


Step 7: At this time you can flip your cuff and over so the ID tag shows.
Use the large curved end of a chasing hammer to smooth the shape
of your rivet.  

****You will notice that the rivet will be flat or
may dome inward.  The is because we are not able to use the domed setter.
Since the rivet we are using is so short, we're trying to
squeeze every bit of length out of the post.


******You will notice that your blank is very flat.  
You can add a cure to the ID tag by using a curving block.


Step 8:  Flip the bracelet face down into the curve of the block.


Place the block on top of the cuff and hammer.
Double check to make sure that your rivets are still secure.


Voila!!!!  You have a beautiful ID Cuff!!!

All of these supplies are available in our ETSY Shop
click above to go to our shop


Enjoy creating!
Lizz Barnes 
Ear in the Envelope Inc


Mar 28, 2014

How to Use a Bracelet Bender and Bracelet Bending Pliers

Check out our video on how to use a Bracelet Bender and Bracelet Bending Plier:


Thumbnail

https://www.youtube.com/watch?v=IPjFCqrxXYk

Enjoy creating,
Lizz
Ear in the Envelope Inc


Gottagettadeal on ETSY 

Mar 26, 2014

Wrap Rings - How to Make a Wrapping Ring Blank

Wrap Rings, also called twist rings, 
are fun to make 
and VERY popular.


We'll go through a small tutorial 
and in no time you'll be cranking - out piles 
of these fun jewelry pieces.

***Note: if you're going to add a metal stamped design, 
do this before wrapping the ring.

The Tools You Will Need
                                                  
                                                  1)  A Ring Mandrel

                                                  2)  An Aluminum Wrapping Ring Blank
                                                                  
(You can get these at Gottagettadeal on Etsy Click Here)

                                                 3)  Wubbers Loop Bending Pliers


Start by placing the ring blank at an angle 
on the barrel of the pliers.

Pinch the very end of the ring blank.


Continue to hold the pliers closed and bend
the ring blank around the barrel.


Flip the ring blank and bend the other end.


Place the ring blank back on the mandrel
 with one end at an angle
and continue wrapping 
until the entire blank is in a 
spiral shape.  

You may need to pinch the ends 
and pull the wrap in a little tighter
at the ends to make sure 
the entire ring is in alignment.  

You don't want any ends sticking out. 
This could snag on clothing.


Place the wrapped ring blank on a mandrel.  

Check the size.


If the size is not large enough, 
then with some pressure, 
pull the blank down toward the larger sizes.  

The radius of the ring will begin to expand.  

You will need to go slightly past the size you want 
because the ring will spring back a bit 
when you take it off the mandrel.


Voila!!!  

You just did it!  

You made your very own wrap ring!


Beautiful!!!

This technique will also work well 
with thick wire with multiple wraps.

Feel free to contact me with any questions.  
I'm always happy to help!!!


Remember to LIKE our page and you'll get 
updates of new techniques and upcoming classes!

Thanks again!  
Enjoy creating!
Lizz


Mar 2, 2014

Soy Sauce for Jewelry????

I just learned that Soy Sauce is amazing for cleaning copper!!!! 


Your blanks may arrive with a slight bit of tarnish.  A quick solution for tarnished copper and brass blanks is to get a bowl full of soy sauce. I know it sounds weird, but it works.  Let the blanks soak for no more than 5 minutes in a plastic container.  Clean with dish soap and water.  Make sure they are completely dried when you finish so you don't get strange streaking.

Try it and let me know what you think!!!!

Enjoy creating,
Lizz

Textured Cuff Project online at Art Jewelry Magazine

http://art.jewelrymakingmagazines.com/projects/subscriber-projects/2014/01/anodized--distressed-aluminum-cuff


Check out the March 2014 issue of Art Jewelry Magazine.  You'll find a project that I had the opportunity to write for the magazine.  Let me know what you think.  And PLEASE send pictures of your finished projects.  I'd love to see how you put your creative twist on this process!!!

Enjoy Creating!!!
Lizz

Jul 18, 2013

Gilder's Paste and Texture

"This wax-based medium can be used to add non-fading color or a gilded finish to materials such as Metal Castings, Filigree, Brass Stampings, Ceramics, Wood, Etched Glass, Polymer Clay, Resin and more! 

It can be applied as-is to clean, dry, oil-free surfaces with a cloth, cotton swab, sponge, your finger... or thin it with paint thinner to create a paste, paint, stain or wash. 

Smooth surfaces should be slightly roughened with fine grit sandpaper or steel wool before application. 

Gilders Paste dries to the touch in 10-15 minutes and completely dries in 12 hours with no tacky residue. 

One tin of Gilders Paste covers over 30 square feet of surface area.

Choose from 9 UV resistant colors which can be layered to create stunning and unique finishes and textures!"


Art Beads has 2 great articles and a video on how to use Gilder's paste.   

Check it out at:

How to use Gilder's Paste

Gilder's Paste FAQ

Quick Video 

Have fun experimenting with this fun medium!!!

And enjoy creating!

Lizz 

at Ear in the Envelope Inc

on Etsy at gottagettadeal for supplies
or
at DesignsbyLizzBarnes for my finished pieces


Apr 14, 2013

Sizing Your Cuff

Sizing a cuff is quite simple.

Measure the circumference of your wrist with a tape measure.  

My wrist measures 6-1/2"

Pinch the inner wrist joint.  Measure this space.

This is the space that you will need to leave open in your cuff.  


This area measures 1 inch on my wrist.

Subtract your wrist measurement

from the width of the inner joint of your wrist.  

This measurement will be your perfect cuff size.

My perfect cuff size is 5-1/2 inch.


We will begin offering a 5-1/2 inch cuff very soon.

You'll notice new listings for 5-1/2" cuffs.

*********
Note:

We've taken the 8" cuffs off our site.  

It is very unlikely that the average man or women will wear an 8" cuff.

If for any reason you need an 8" cuff, we can set up a Reserve Listing for you.

Hope this helps!

Enjoy creating,
Lizz


Ear in the Envelope Inc


Nov 8, 2012

Instructions for Metal Stamping


METAL STAMPING:
The concept of metal stamping is simple.  
You are creating an impression in a metal blank 
by using a hammer to hit a metal stamp into the blank.

TOOLS and SUPPLIES for Metal Stamping
**Click on the Name of the item and you will find the item in our ETSY store.

- rubber block (optional but it deadens the sound)
- item to be stamped (bracelet blanks or tag/key chain)
- masking tape (for guide or to tape-down a guide)
- Industrial Sharpie permanent marker
- alcohol pads
- stamps (characters & fonts) Beaducation.com nice quality stamps

THE METHOD
Start by selecting a blank to work with. Decide what kind of impressions 
you’d like to make. The possibilities are nearly endless (given the stamps available). 
It could be your favorite phrase, a friend’s name, or just a pattern of characters
 (i.e. a row of flowers, for example) 


Next, stamping is MUCH easier when your item is secured to your block. It keeps 
it from moving while stamping. Masking tape can be used in a dual-purpose fashion; 
as a way to secure your item, and as a straight-line guide. 
There are other ways to create a guide as well. A scrap piece of metal can be taped 
on top of your item, and the straight edge serves as a great guide.

Note: You can totally do all of this free-hand as well (no guide, no securing)

For stamping text, it’s a good idea to find the letters or characters you want for 
a word or phrase, and line the stamps up accordingly. This way, it’s easier to keep
 it all in order. 
BE SURE to check that the letter or character is facing the right direction 
before stamping!


Using your guide to rest the stamp upon, just give the stamp a good sturdy whack 
with the hammer. Confidence is the key! If your hit is too timid, the stamp won’t 
register. One hit is important to keep in mind; as multiple hits might register multiple
 images, making it appear blurry.


A few thoughts to keep in mind
When doing text, begin with your middle letter and work your way out to both sides. 
This will help get your word or phrase centered.

Use some scrap metal to practice your “swing” and to help lay out your designs.

Another fun thought to keep in mind
Multiple characters can be used to compose another character (a sideways “B” with 
a number 1 on either side makes a nice pair of glasses) See what I mean? (haha)  
Get creative with it!

AFTER STAMPING
Using the Sharpies, fill in the impressions you made. Don’t get too concerned with
 going outside your lines and impressions! Any excess Sharpie can be removed with
 an alcohol pad or even a buffing cloth.

You should be left with a nice engraved look, filled in with black. A nice contrast!

BAKING
While the marker can stay on its own, it will wear off over time. You have the option 
to actually bake your item. This sets the permanent marker, permanently.  Baking is 
really easy. Just place the item in your oven or toaster oven 
at 260 degrees F for 30 minutes.

DO NOT use a microwave as a substitute! Disastrous results could ensue!!!

POLISHING CLOTHS
Yellow buffing cloths are available (and also sent along with our business card as a gift). 
These are very helpful in reviving the sheen in your item after stamping or after baking.

PRODUCTS AVAILABLE
At our site, we have all the products available that you worked with today! Check it out

***REMEMBER - One hard hit is always better than a few soft hits.  If you hit more
 than once, you take a chance on creating a shadow.  This happens when your
stamp moves slightly between hits.


One final note.  A nail is a perfect option for a period or colon.

Hope this helps!!!  Happy Stamping!!!  And enjoy creating!!!
Lizz